Hey planner girls! I'm back with another Planners & Journals #PnJplannerkit reveal. Can you believe it's already November? Well, I can't! Time's ticking too fast.
Now I know the PnJ subscribers have already received their kits. I actually just got mine today because I went on a short trip to Baguio with my boyfriend's family. Hihi. Anyway, although a lot of you have already rummaged through your kit and have actually started using them, I still wanted to blog about all the inclusions in the kit.
Now, I have to warn you.. this post will be a pretty long one because aside from showing the kit's contents, I'm also going to show you how I'll be using what's in the kit, as well as share how I decorated my week with the kit.
Let's get started! I have the personal sized kit for ring bound planners but I've actually been contemplating if I should try the TN kit for my Fundori (PnJ's fabulous printed leather fauxdori). What do you guys think? Should I give in?
The theme of this month's kit is Happy Flamingos. It's all about flamingos and watercolor! This month, Planners&Journals collaborated with watercolor artist, Ms. Natalia Noguiera, of
I love the dashboard that came with the kit. The watercolor effect on it is perfection. It came with a quote by Jarod Kintz that says, "when the silent flamingo dances pink with desire, I'll be there sipping on owl stares and kitten curls".
It also has the usual inserts that comes with each kit. 3 pcs back-to-back week on 1 page..
5 pcs back-to-back week on two pages...
and 15 pcs back-to-back daily to do page.
How cute are the lemonade glasses for water intake tracker? I love them!! ...even though I don't drink that much water. Oops! Shhhh.
You will also be getting an assortment of cardstock and journal cards,
4 pcs of coloring post cards with images by SanqunettiDesigns and a Simbalion Watercolor Cake with 8 colors,
a flamingo paper clip by iprints and a handcarved rubber stamp by CraftAvenuePH. That's right! A handcarved rubber stamp for each and every kit! Crazy good right??
Oh and you'll also get these awesome tattoo and band-aid with the same theme as extras! How cool is that? Who wants more? Cause I definitely do!!
There you go! What did you think about the kit? Now I thought the kit was so nice that I started tinkering right away.
My first dilemma was the binder to use: The Filofax Original in Dark Aqua or the Filofax Malden in Aqua. I received both binders in October so I really wanted to use one of them. I eventually chose the Malden because.. well, I waited for it for so long, why wait longer??
The first thing I wanted to make was a new dashboard. Each kit actually comes with its own dashboard but I like to use that as a month's divider in the Daily section of my planner.
First I cut up the cardstock with the tropical leaves design using my Recollections paper trimmer into 4" x 6.5" size. Then I punched holes using a regular 1-hole punch so that I would know where I to place the decorations I wanted to layer on it.
I picked out a 3" x 4" journal card that I wanted to layer on top and cut the journal card with the single flamingo design to layer too.
Then, I brought out my Pink Paisley Citrus Bliss ephemera pack and chose a few addiional embellishments which I then adhered to my design using a Xyron sticker maker.
So there! thought the final washi tape touch would make it look a little more done.
Now on to decorating my week.
The very first thing I did on my weekly spread was to put a washi border and to stamp the date. I try to do this first because I tend to forget to leave space for the date at the end of decorating. I used washi tapes from Craftee Dandee and the Brush Dates set from StudioL2e.
Then I added The World of Fraffee's stickers on the days I knew there was something special or important happening on the day.
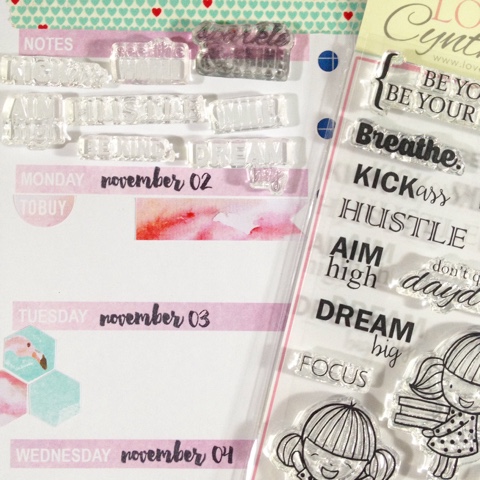
I recenty received my Love Cynthia clear stamps when we had our Planner Party last October 24. I found that one of the sets, Be Your Best Self, had a lot of fun enouraging words so I built them and arranged them to look like a collage of words.
Sometimes, you'll need to stamp on spaces smaller than your stamp. That's what happened between the flamingo stamp and stickers on Thursday's design. What I do is cover up a portion of the stamp with washi tape and dab my ink carefully on the clear stamp. That way, I'll only put stamp up to the space needed.
I also used the flamingo wooden stamp that came with the kit. It stamped so beautifully, I so LOVE it!
And lastly, I prepared my daily to do by simply stamping on the dates.
There you go! Thanks for reading this looong post. I hope you somehow enjoyed!
Have you started using your PnjPlannerkit? We would love to see what you did with yours! Do use the hashtags #PnJplannerkit and #ilovePnJ whenever you post so that we can see your pictures quickly.
Happy planning, girls!


