Sunday, September 13, 2015

I shrunk Mommylhey into paper clips!

Hi everyone! I wanted to share with you my new found love – shrink plastic! It’s basically an amazing way to turn your drawings or stamps into cute little paper clips and charms. I've been having a shrinking craze over the past weeks. If you are familiar with the September Planners and Journals PnJplannerkit , you will see a shrink plastic paper clip appearance there too. 

I’m sure you recognize these stamps from the MLD Social Babe set and I will walk you through how I was able to turn them into little paper clips. 


Here are the materials that you will need:

  1. Shrink Plastic 
  2. Stamp sets – I used the MLD Social Babe stamp set
  3. Scissors
  4. Hole puncher (if you want to make charms. I didn’t have enough tools so I wasn’t able to)
  5. Staz On Jet Black
  6. Different colors of Sharpie markers
  7. E600 industrial strength adhesive
  8. Paper clips
  9. Wet wipes (not in picture)
  10. Oven toaster (not in picture)Wax paper (not in picture)


Let’s start! There are two kinds of shrink plastic. One that is smooth on both sides, and one that is already rough on one side. If you have the type of shrink plastic that is smooth on both sides, you will need to sand the other side of the shrink plastic to make it a little rough. The reason why you'll need to sand the shrink plastic is so you will be able to make the coloring material that you will be using stick to it more. The shrink plastic that I got is already rough on one side, so no sanding needed for me. 

Get a sheet of shrink plastic and dab your choice of stamp on the rough side of the shrink plastic. I will be coloring in my stamped images so I used the StazOn Solvent ink pad in Jet black because I wanted to make sure the ink will not run or smudge when I fill it with color. Remember to clean your stamps completely before you keep them! This will prevent it from further discoloration and of course so it will not stain your other ink pads. Other people have special stamp cleaners, I just use the regular baby wipes.


Let the StazOn dry a little bit before you start coloring in so that the ink will not smudge. I used my trusty stash of Sharpies for coloring. Remember, you have to color on the rough side of the plastic, on top of your stamped image. I like using lighter colors for my shrink plastic because it gets darker and brighter after it shrinks.

After coloring, preheat your oven toaster for a couple of minutes. While waiting for the oven toaster to heat up, cut the shrink plastic carefully and place the cutouts on a sheet of wax paper (still rough side up). Your oven should be ready then. Place the cutouts in the oven and set the timer to 1-2 minutes. That should allow the shrink plastic to “cook”. The plastic will begin to shrink (watch it! it's like magic!!) and when it stops shrinking, you will need a spatula to press on it and make it flat. Leave it in the toaster for another minute, take it out then wait for another 3 minutes for the shrink plastic to cool down before you take it out of the wax paper.


After it cools down, you can easily turn your shrink plastic to cute paper clips! Put a drop of E600 industrial strength adhesive at the back of the shrink and place your paperclip. Let the glue dry completely for 24 hours in a well-ventilated area.


And after 24 hours, you have your very own Mommylhey design paperclips! Isn't that fun?!


That's all! Now, I'm off to make more paperclips! I bought 3 extra packs of shrink plastic so I could play around.  LOL! Let me know if you tried shrinking. Enjoy! 


Wednesday, September 2, 2015

Making planning fun and functional with Planners&Journals and StudioL2e!

Hello everyone! Welcome back. How is your week so far? Well we just had another long weekend in the Philippines to celebrate National Heroes' Day and my highschool friends and I were able to take a quick trip out of town. It's been months since our last trip! So, we went on a road trip to Bulacan and Pampanga.. but oh, I wouldn't want to bore you about that! 

Let's talk stamps! That should be more interesting right? Haha! I just received my (early) August release stamp sets from StudioL2e so I was very eager to sit down and get stamping! I planned my day using my magical unicorn themed daily inserts from Planners & Journals with my StudioL2e stamps and for the first time, I'm going to do a run through of how I used them here in the blog. 

Here's a quick look on my layout before I wrote or stamped anything in. It's actually a photo from my previous post featuring the September PnJplannerkit. Isn't it nice seeing all the pretty goodies. 


Now, here's how it looks like after stamping on them. Looks a lot more magical right? Just by adding the colors, it already feels magical to me. Oops! I realize that I had already used the word 'magical' 3 times!! I will most likely overuse that word in this blog entry. Haha. It's practically the theme of the Planners & Journals kit anyway so I guess that should be fine, right? Or maybe we can all just pretend it's okay? Haha! 


Okay, let's talk about how I used my stamps! First, I used StudioL2e's Iconic Outline and Borders to add the little sections in my schedule column. This marked the scheduled pickup and tutorial session I had for the day. Then, I used the notepad shaped stamp from the Happy Notes set to plot my lessons to teach. I felt like I didn't need to specify the time for when I would teach since my schedule in school is kind of routinary, meaning I teach at the same time every day so it's practically impossible for me to forget the time. That little notepad is just like an added reminder on the topic I was going to teach for the day.  


I used the StudioL2e Making Planning Fun - Sherbert stickers to section the things I do not want to forget for school and well, other important things. I also used different colors for my heart lister from the Seasonal Plans: Spring set because I think it adds to the fun. Wait, I actually don't know what you call it. I mean is it a ribbon lister, a listing point, bullet point or ribbon point? Lol! What is it?? Help me! Haha if you do know, please comment it below because I feel silly calling it a lister. Haha. Anyway, going back, what do you think about the color play? 


Moving on to the other side of the page, I made a list of the more things I needed to do using the Creative Plans set. I used the washi strip stamps first then stamped the words on top of them with Versafine Onyx Black ink so it produced that crisp color! 

And on the notes part, I played around with 3 stamp sets from StudioL2e. I used Birthday Wishes set to make the background in the box. Then I "built" a phrase by combining 'Let's get lost' from the Wanderlust set and 'this moment' from the Right Here Right Now set and then I just wrote the word 'in' to make it complete. Does that make sense? Hihi. 


And there you have it! The cutest and most magical daily planner spread that I ever planned on. 


Oh I almost forgot to talk about the Top 5 section. I'm not sure exactly how others use it but if you're familiar with Listers (yes, I mean people) that is gaining popularity in Instagram, they have these daily prompts to fill in their journals. Well, I tried to do it but just couldn't stick with it. I didn't have enough time to finish all the prompts so instead of putting the pressure on myself to finish the prompts, I decided to make my own and write it whenever I get to use my daily spread. Today, I decided to go with "things that made me smile today" because I needed to boost my rather gloomy mood yesterday. I used the heart shaped stickers from StudioL2e to mark each number. 


And I also used the star shaped stickers to mark my water (and coffee, shhhhh) intake. 


That wraps it up! Today was an extra fun day because I actually got to work with my planner more than any other day. Big thanks to StudioL2e for "making planning fun" and to PnJ for making it functional! I really did want to try to use my StudioL2e stamps some more because it feels like it's been so long since I used all of them and after this ..I feel like I just had a stamping party of my own. Lol!


Happy planning everyone! I hope you enjoyed your visit today! 😉

Wednesday, August 26, 2015

Unicorns and colorful dreams

I can't believe it's already that time of the month! My Planners&Journals #PnJplannerkit for September is already here! And if you subscribed, then your kit should already be on its way to you starting tomorrow. How exciting is that?? 


Last night, I went to the PnJ headquarters to help pack the kits and so I was able to bring mine home! (Btw, thanks Summer for letting me bring it home even though it wasn't ready yet. Hihi.) It was an incredible sight seeing (and hearing) their machines at work. You should've seen all the love and hardwork that goes into each kit. Here was my fun sight last night. You've probably seen this on my Instagram account.. 


Now I'm very excited to share the contents of the kit with you. I took as many pictures as I could as I "tore" through the package. Oh! I also might be able to share with you some ideas on how to use the items in this month's kit. 

First of all, this month's kit comes with a sturdy pouch from our contributor, Supot Sisidlan. What I love about this pouch is that the A5 sized cardstocks can fit in it! I actually have sooo many pouches already but a stationery addict like me can never have too many pouches. Lol! So many planner goodies I can store! Oh, and btw, their pouches lasts long! I still have my pouch from 3 years ago! 


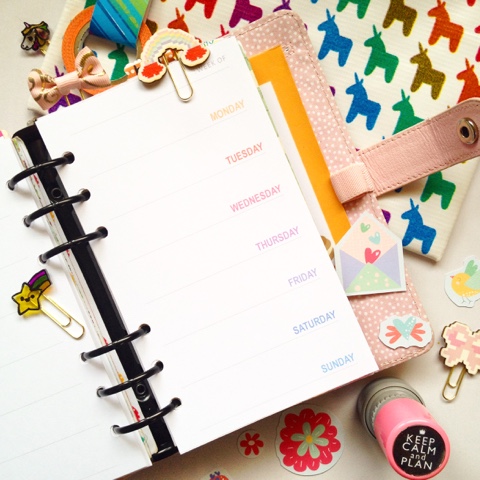
I've always enjoyed how the idea of unicorns takes me to magical places. A place where colorful dreams and ideas are made. That's why I'm loving the theme for this month's kit. It's fun and light. It just makes me smile. Here are the two A5 sample cardstocks inclusive in the kit. The layout is designed the P&J team and the unicorn designed by 7th Design. 


The kit also comes with a roll of slim MT tape from DolcesOnline, 'Others' stickers by Toshiyuki Fukuda , a "Keep calm and Plan" self-inking stamp and a set of shrink plastic and wood veneers paper clips that I made. 


Here's a closeup of the stamp for you! I am OBSESSED! 


Another thing I am obsessed with in the kit is this pack of ephemeras by 7th Design! Seriously, I need tons!! I use ephemeras almost like stickers. It's a nice way to enhance your planner pages but you can also use them to make cards, gift tags and labels. So many possibilities!  I'll make sure to show some next time! 


Every month, the kit comes with a dashboard that goes with the theme but I especially like this month's dashboard. It says, "Play with fairies, ride a unicorn, swim with mermaids, chase rainbows".  Somehow it gives a sense of empowerment ..that sometimes, it takes a little bit of imagination, color, and magic to keep going. 


Of course, we have to talk about the most important feature of the kits: the inserts! 

The rainbow days on my week on 1 page (wo1p) is perfect for my mini journaling. I haven't actually immersed myself completely into journaling so I like using my wo1p so I don't feel too overwhelmed with daily entries. Of course there are other uses for it too. You could use it for normal planning. I would plot my lessons for Kinder class and tutorials on it before. 


The rainbow effect on the week on 2 pages (wo2p) for the Unicorns and Rainbows theme is cute as ever! Soooo many possibilities for designing with washi tapes, stickers and of course, stamps! Knowing myself, I will still probably stick to a theme per week. I can't wait for my Sweet Stamp Shop stamps to get in! I got some to match this months theme. Oops! 


..and here's the daily layout. It's also very colorful but I know I'm gonna enjoy stamping on it. I have some Dew Drop brilliance ink that would probably look good on it. I'm quite positive my Mommylhey stamps would look super cute on it too but I'm already eyeing my StudioL2e Hi-light It stamps for the schedule area. 


but below is my favorite feature of the daily inserts! I hope I check more good days than s*@%$& days! Lol! 


So there you go! That's about it. I hope the September theme for the PnJplannerkit puts a little color in your life this month. They also made it a little sweeter with a nice treat from @happyeveraftersweets (on Instagram) that you'll find in your kits! We call in the unicorn poop! Don't worry though. It's just meringue!


Happy planning! 

Sunday, July 5, 2015

Plan with me!

It's the last week to use my wo2p spread from the June Plannersandjournals Planner kit and I really wanted to use it before I start with the super Kawaii July kit. 


This week I used up the sample cardstocks inclusive in the kit and even the cardstock where the pins and clips were packed with, cut it up and added them as embellishments. 

I added the floral Craftee Dandee washi tape at the top, her slanted mint strip

In full bloom

The whole month of June was pretty amazing. I attended a workshop with the awesome Kelly Purkey, chosed as part of Mommy Lhey's design team, started school again and had a pretty successful planner kit with Planners and Journals. 

I wanted to share a peak through of the entire month with my planner. I hope you enjoy! 


Thursday, June 25, 2015

Kawaii July PnJplannerkit

Hi everyone! It's almost June 27, so that means your July Planners and Journals Planner kits are almost ready to be shipped. We've already started packing and soon you'll get these kawaii goodies! 

Before I go on and talk about the very kawaii July PnJplannerkit, I recently got my Turquoise binder from Planners and Journals and I am totally in love with it! It has a soft feel on the front cover, the pockets are nice and deep, it lays totally flat plus the color is perfect! Lol! It's my favorite color. Hihi. 


I also feel like it matches my July kit more than my gold Kikki-k so that's what I'll be using next month. 

Time to start talking about the kit! Well, I got my planner kit over the weekend and I dug right in. I passed by the Planners and Journals office then opened my box of goodies in the car! So the next two pictures were taken while I was in the car. Lol!! 


I always love how the goodies are carefully and lovingly packed. Packed goodies also adds to the element of surprise. Hihi. 

Here's a full view of my dashboard from the kit. You see, for this month, PnJ decided to go a little personal and have each subscribers name printed in Katakana (oops!! I made a mistake and said Katana --that's the Samurai's sword). Mine says "Chinky" ... so, Yay!! 


If you have a binder type planner, you will still have the week on 1 page layout..


Week on 2 pages layout..


and my favorite, the day on 2 pages layout. 

When I posted another peek of my kit over at Instagram, I couldn't stop raving about the inserts all because of this spread! I don't know why but I like it so much. It's just really cute! Hihihi. 


You also get a sticker sheet with the adorable kokeshi doll and hole reinforcers that you could easily insert in your binder. 


2 sample cardstocks with sketches by me (yahoo!!!), 2 pcs of 3x7 envelope and pocket that I will probably punch to add holes and add them to my PnJ binder, 1 MT slim washi tape and a Pilot Juice pen from Dolcesonline, 1 adorable kokeshi doll charm by Genndesigns, a cool Japanese paper doll bookmark handcrafted by Bookmarks.planners , a Pilot Juice pen from Dolcesonline and 6 meters of  glue tape.. my personal favorite and a MUST item for any planner girl. 


**Oops! I forgot to post, there's also an additional pack of origami papers. I guess you have something else to look forward to.**

That's about it! I'm just so happy and blessed to be part of the design team for the PlannersandJournals Planner kit. It just keeps on getting better and better. I can't even begin to explain how excited I am for August's kit so I hope you subscribe! 

Sunday, June 21, 2015

Love this!

I received my Mommylhey stamps from the May release over the week and got really excited so I quickly stamped for my week's layout for June 22-28! 


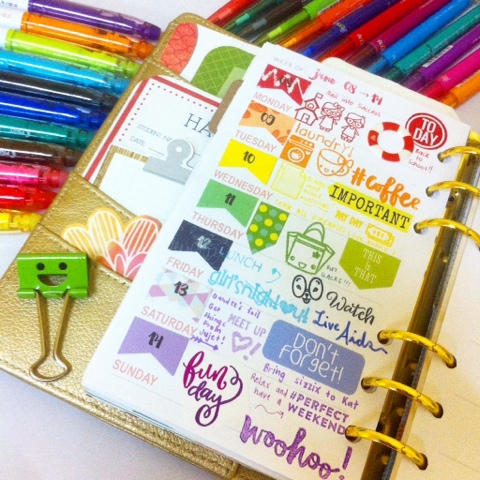
I used the Pixie Alpha set to stamp the dates and the word 'blog', stamps from the Doodles Chores 2015 and Kawaii Weather are spread all around, that cute heart in a circle is from the Polka Stamps set and some other stamps from the older release. Oh and also used the banner flag and hot air balloon stamp that you see on June 25 and 28 from Marryl Crafts Heartstrings stamp set! 

I'm a little under the weather so I'm hoping this will help me be on a brighter mood this week.